Photo layouts · Worked example
How to Make a 9 Photo Collage: Two Real Layout Examples
Photo Collage Pro Team · Published
Compare two real nine-photo collages made with the same images. Follow the editor screenshots, choose a focal point, check crops, and export a 1080×1080 PNG.
Nine photographs can feel like a contact sheet or a small visual story. The difference is often the layout rather than the pictures themselves. In this walkthrough, we use the same nine landscape photographs to make two square collages in our 9 photo collage maker.
Both results below were downloaded from the actual editor. These are demonstration photographs from the site's existing Unsplash collection, not a customer's trip or portfolio. The interface screenshots were captured in the English editor; the finished compositions are the tool's exports, optimized for display here.
Compare the two finished layouts
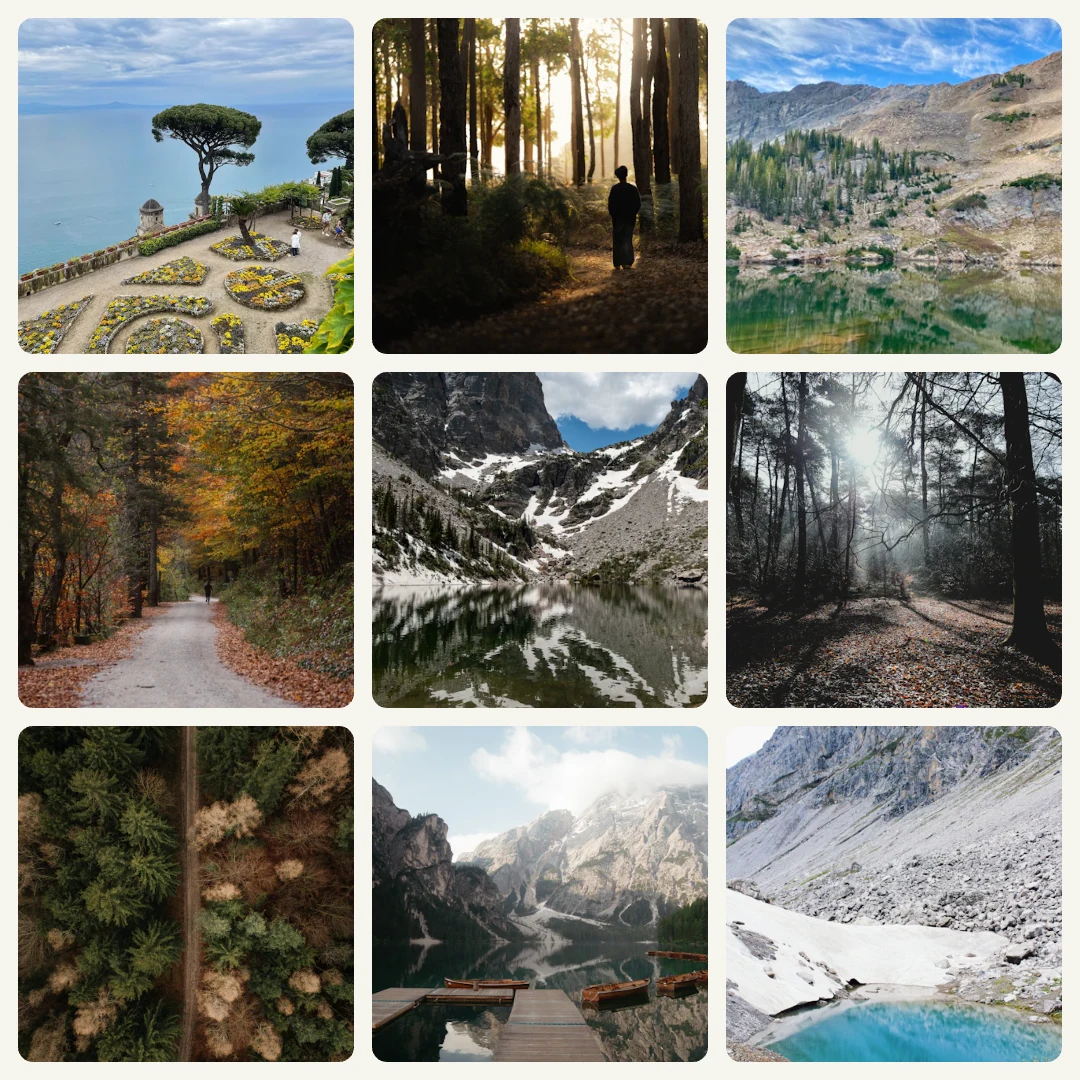
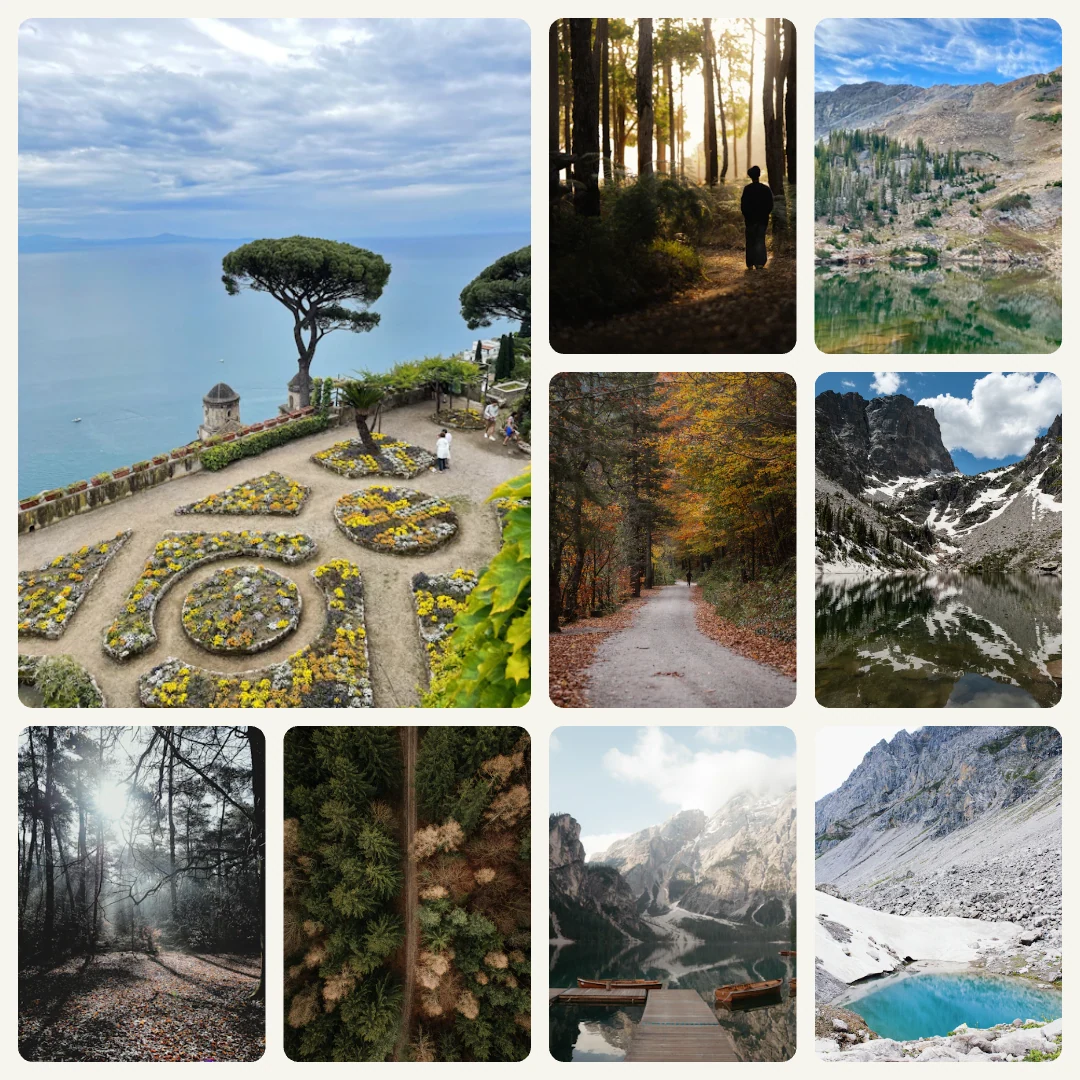
Choose Classic 3×3 when the collection matters more than any single picture: nine favorite moments, a monthly recap, or nine comparable product views. Choose Lead image left when one photograph should introduce the story. Here the garden and sea act as an opening scene, with forests and lakes supporting it.
Neither layout is universally better. In the second version, the smaller frames ask more of the source images: distant details and small text are harder to see. If every picture needs equal attention, keep the classic grid.
Prepare the same nine photos
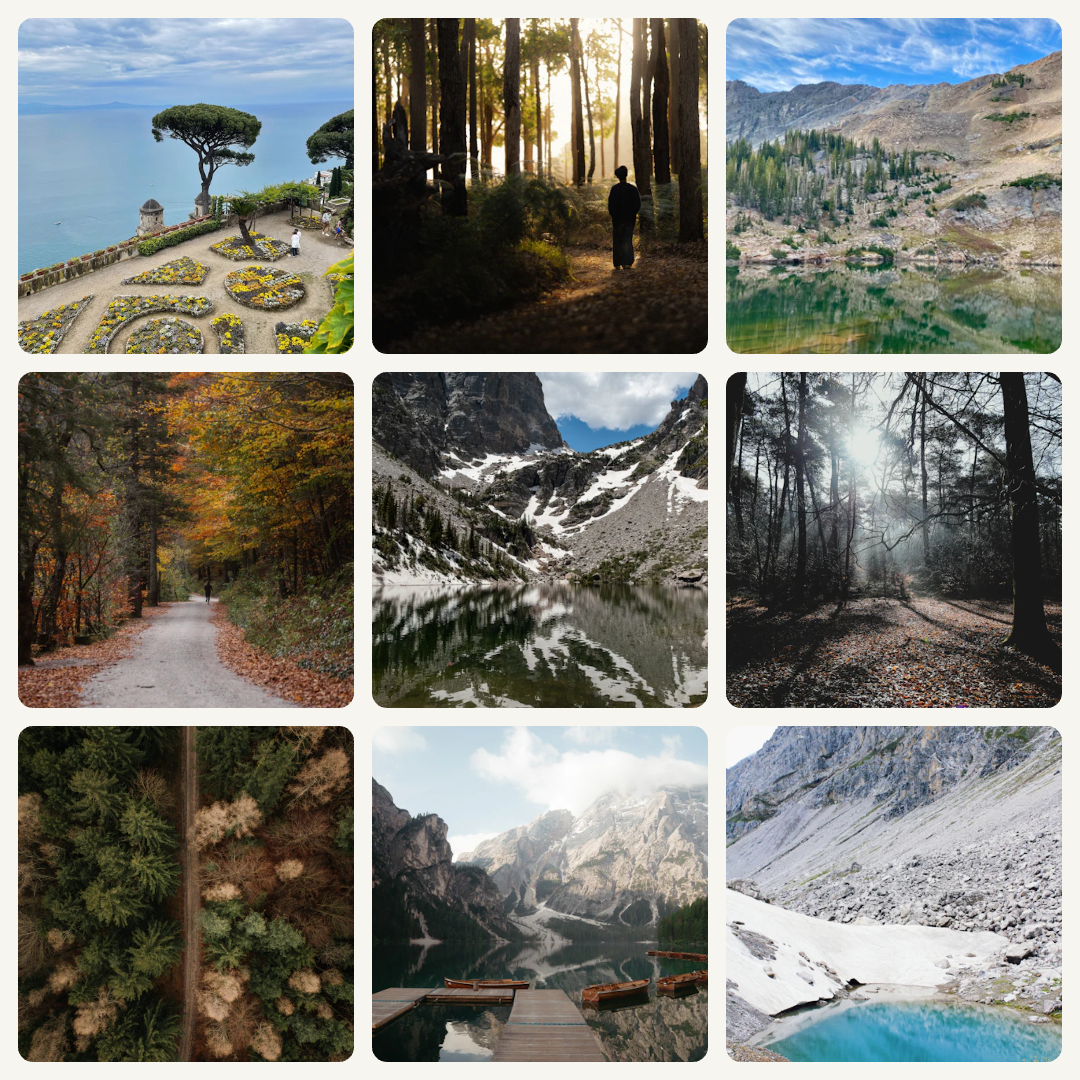
For this example, the order is coastal garden, forest light, alpine lake, autumn path, mountain reflection, misty forest, aerial forest, lake dock, and glacier lake. Keeping that order fixed lets us compare layouts without changing two things at once.
You can use your own nine photos. Start with a wide establishing view, then add distinct moments or details. Check the originals before uploading; do not fill the last slot with an unrelated picture merely to reach nine. For a smaller set, use the general collage editor.
Our demo source files have a maximum edge of 640 pixels. They are sufficient to demonstrate the arrangement, but the 1080-pixel export does not create new detail in them. Use larger originals when fine detail matters.
Make the classic grid first
- Open the nine-photo tool and select Add photos. Choose exactly nine files; export unlocks when the counter reads 9/9.
- Keep Classic 3×3 and the 1:1 canvas. This example uses the initial spacing of 18 and corner radius of 15, with the cream background unchanged.
- Review the thumbnail order. Use the earlier/later arrows if you want to change the sequence without dragging.
- Select a photo to check its framing. Zoom and horizontal/vertical position affect the crop inside that cell, not the whole collage.
- Select PNG and click Export collage. Open the download and confirm it is 1080×1080 pixels.
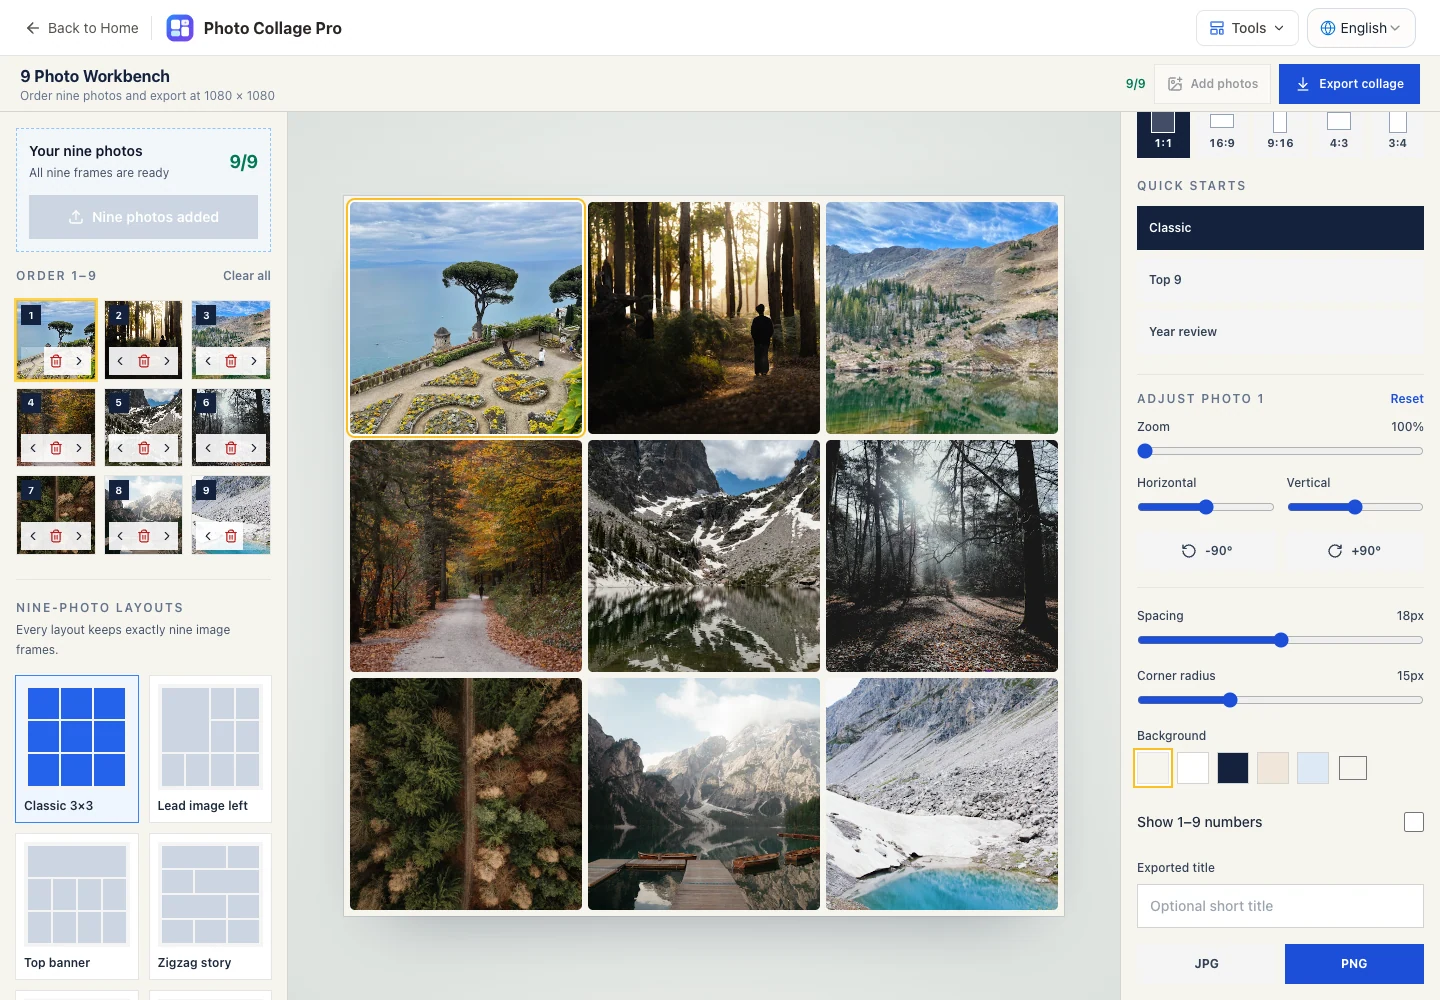
In our classic result, the autumn path sits at the left of the middle row and the aerial forest anchors the bottom-left corner. This separates two similarly green forest views and lets the cooler lake photographs balance the warmer autumn image. That is a composition choice, not an automatic ranking of the photos.
Give one photo more space
With the same nine photos loaded, choose Lead image left. Keep 1:1, spacing, background, and photo order unchanged. The first photograph now occupies the large left-hand frame.
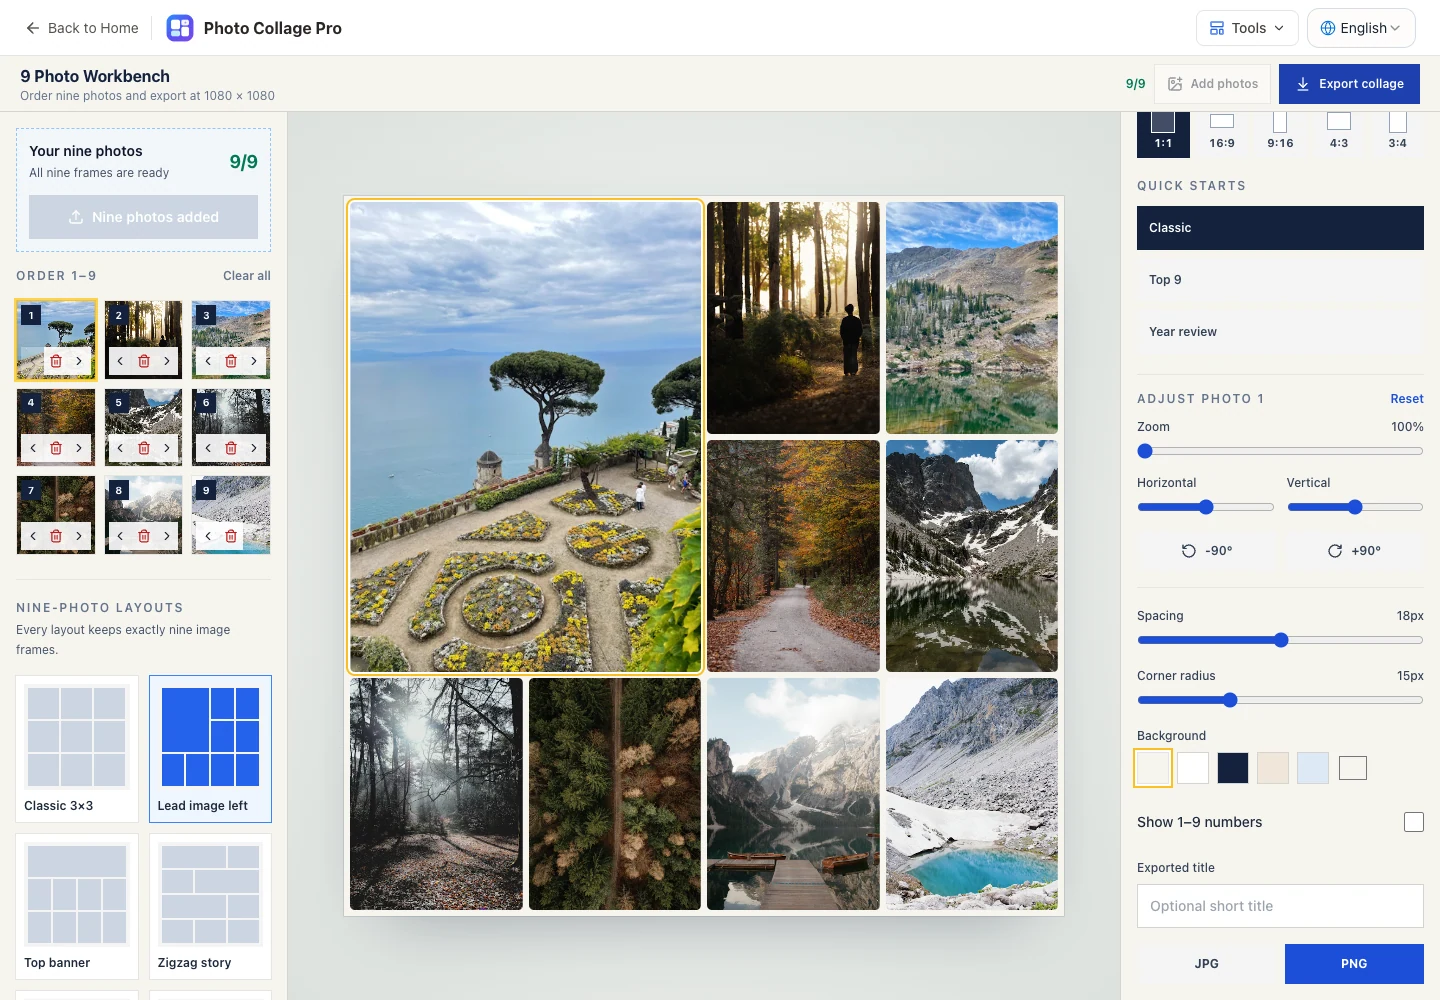
Look at the result as a whole, then inspect each of the smaller frames. A landscape that worked in a square may lose an important edge in a shorter frame. Reposition individual photos when needed. If another image should lead, move that photo to position 1 before exporting again.
Check the downloaded image, not just the editor
The selected-cell outline and editing controls are not part of the downloaded collage. Compare the clean file with the preview and check the following:
- Each of the nine photos appears once, in the intended order.
- Important subjects remain visible after the layout change.
- Fine details are readable at the size you will actually share.
- The file is square and 1080×1080 for this example.
Open the original classic-grid PNG to inspect the actual download. PNG avoids another lossy encoding step, but it cannot repair a soft source image. In an equal 1080-pixel grid, each cell is smaller than 360 pixels once margins and gaps are included.
For a portrait story, the same tool offers a 9:16 canvas. If two photos tell the story better than nine, follow our two-photo vertical story walkthrough.
Common questions
Is this the same as splitting one photo into nine posts?
No. This workflow combines nine separate photos into one file. It does not split a single image for a social profile grid.
Does Top 9 fetch my most-liked social photos?
No. You choose the source photos and their order. Use numbers when you want to communicate a ranking, and keep them off for an unranked collection like this one.
Where did the example photographs come from?
They are the site's existing demonstration assets. The nine original source pages are coastal garden, forest light, alpine lake, autumn path, mountain reflection, misty forest, aerial forest, lake dock, and glacier lake. They illustrate the tool; they are not presented as user submissions.