Screenshot stitching · Worked example
How to Stitch Screenshots Together: A Real Seam-Fixing Example
Photo Collage Pro Team · Published
Follow a real two-screenshot example: compare the repeated join, check automatic detection, correct the overlap, mask a demo email, and export a readable PNG.
A long screenshot is useful only if the reader can follow it without duplicated or missing lines. In this example, we join two captures of a demonstration document using our photo stitcher, inspect its automatic overlap estimate, correct the seam, and cover a sample email address.
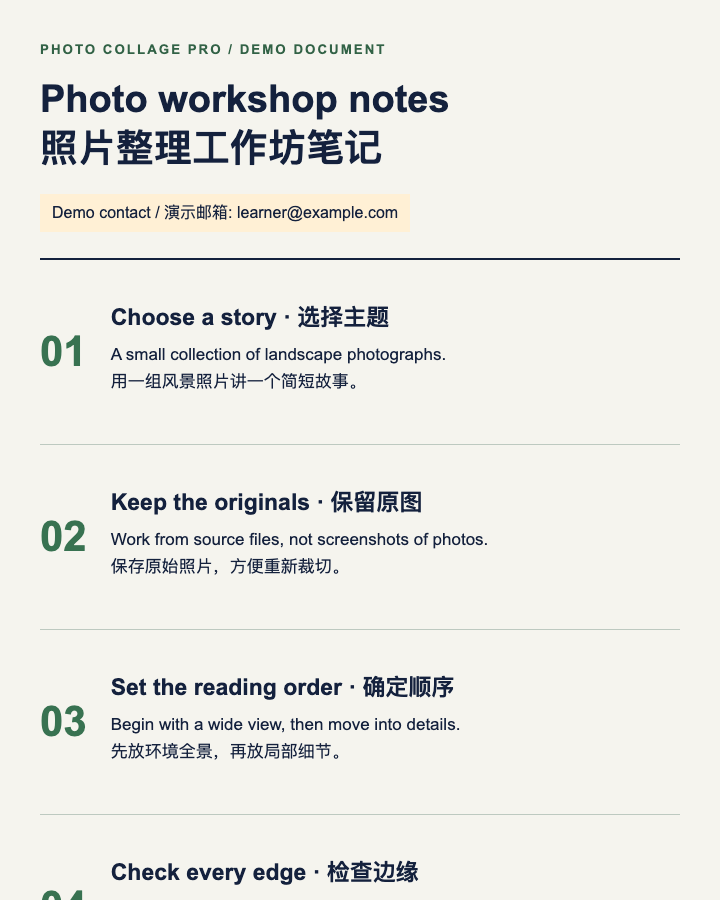
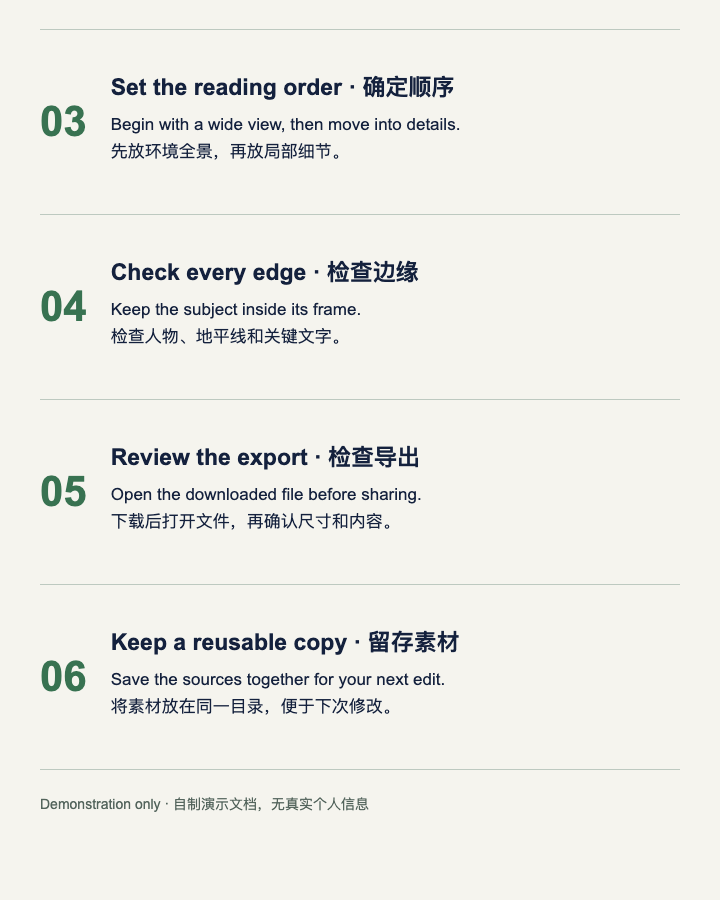
We created the bilingual workshop-notes document specifically for this tutorial. It contains no real personal information. The screenshots are browser captures of that document; the before and after images below are actual downloads from the stitcher, not mock-ups of a result.
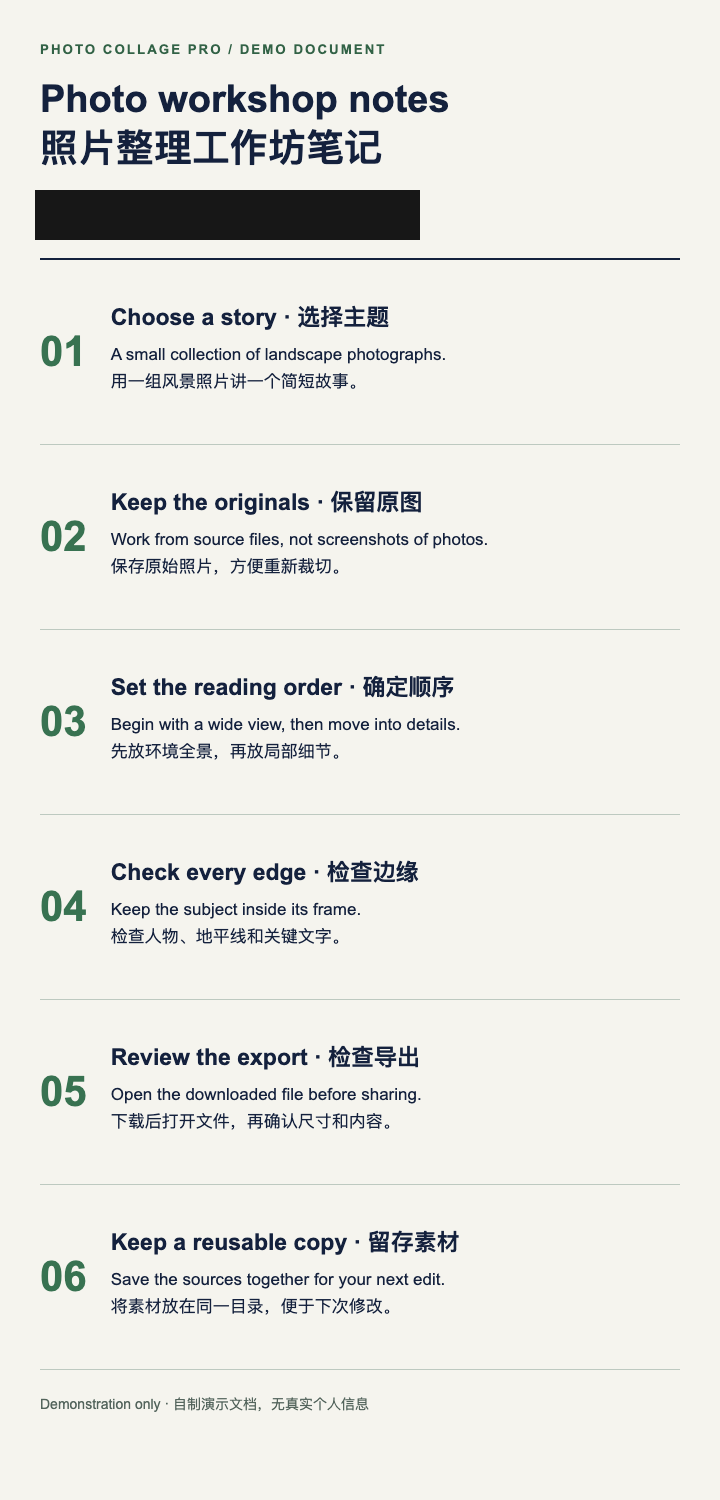
The result: repeated content removed, sample contact covered
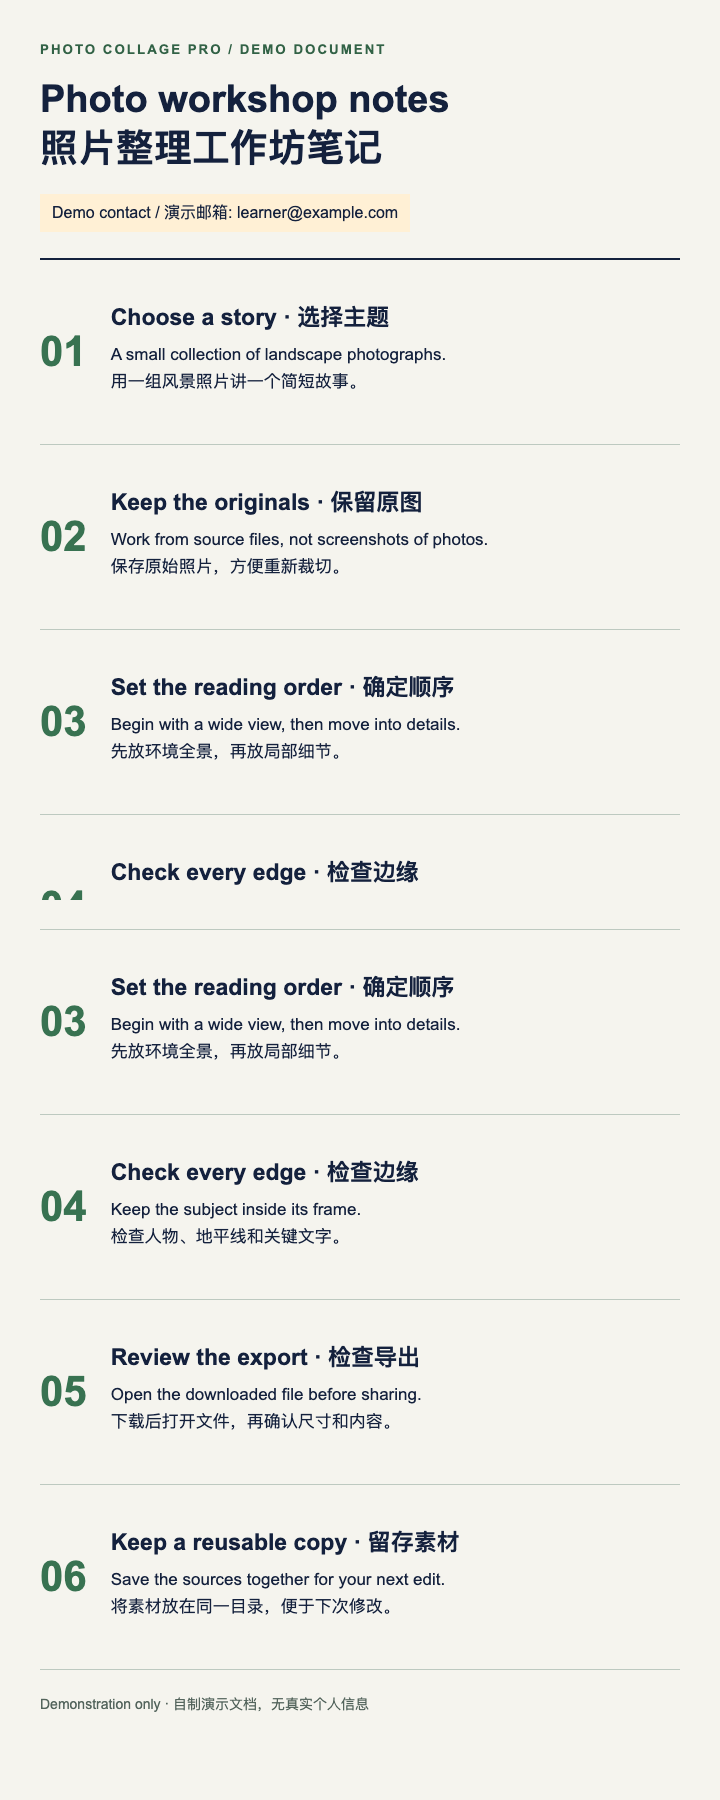
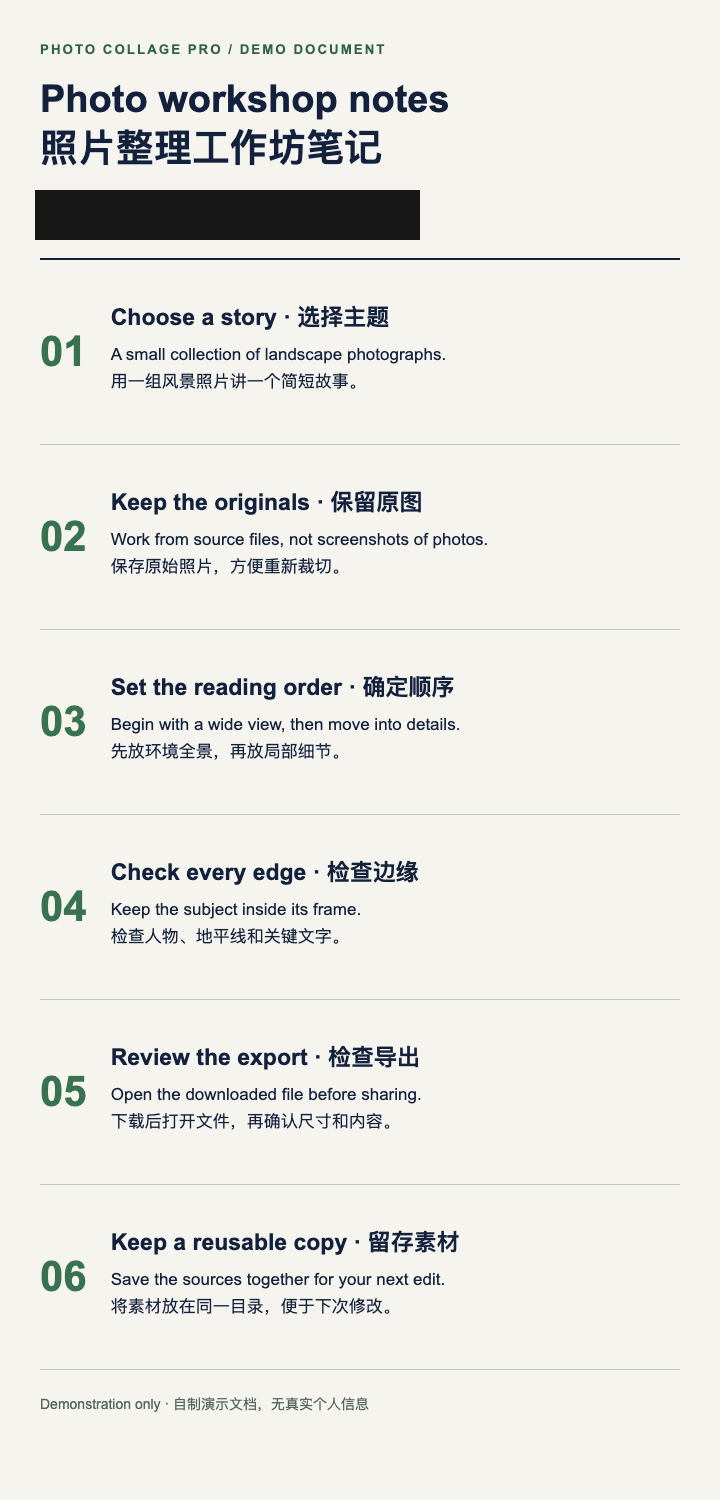
This is a deliberately controlled example. The second capture starts 600 pixels below the first, so the overlap is 900 − 600 = 300 pixels. For arbitrary screenshots, you must identify the repeated content visually; copying our 300-pixel setting would be wrong.
Start with two consistent captures
Both source images are 720×900 pixels. The browser width, zoom, and document styling remain unchanged between captures. There is no fixed header covering the content, which makes this a simpler case than many chat apps.
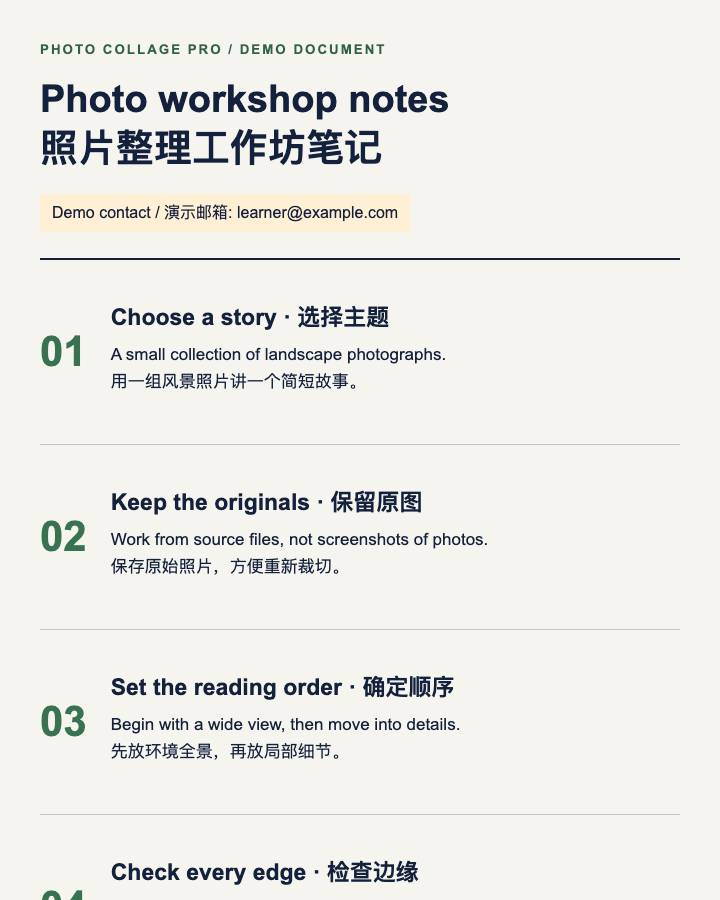
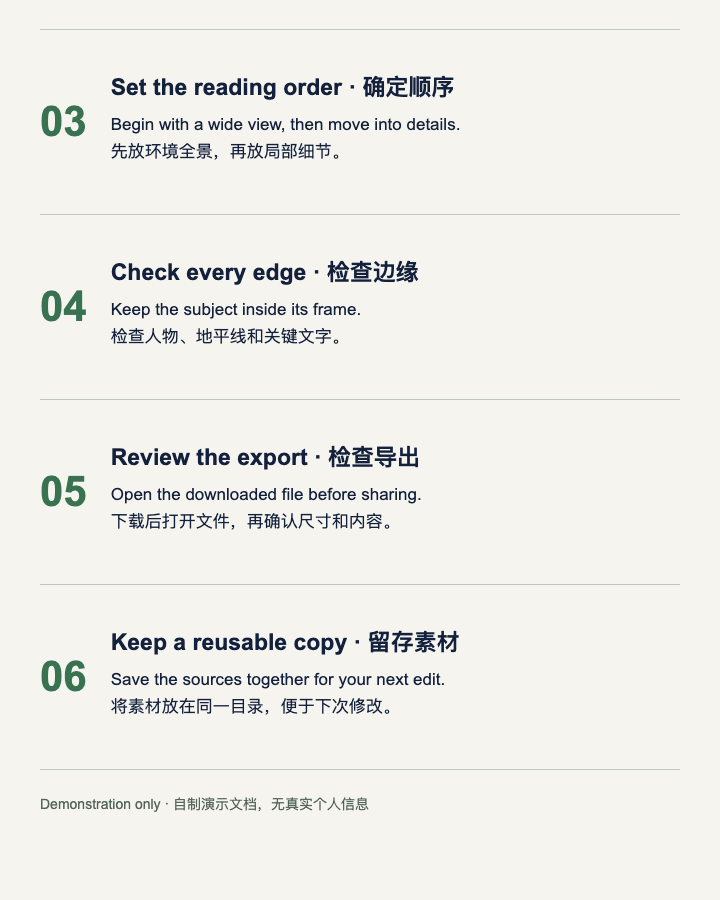
To reproduce this exact case, save source screenshot 1 and source screenshot 2. For your own captures, keep the device orientation and text size consistent and retain the original files until you have checked the final result.
Upload in reading order and inspect automatic detection
- Open Photo Stitcher and keep the Long screenshot scenario.
- Add source 1, then source 2. The first thumbnail becomes the top of the image.
- Keep Vertical, Reduce to match (no upscaling), zero gap, and zero outer padding. Both images already have the same width.
- Select the second thumbnail to inspect Join 1. The seam controls belong to the later image in a pair.
- Check the automatic suggestion against the original screenshots before accepting it.
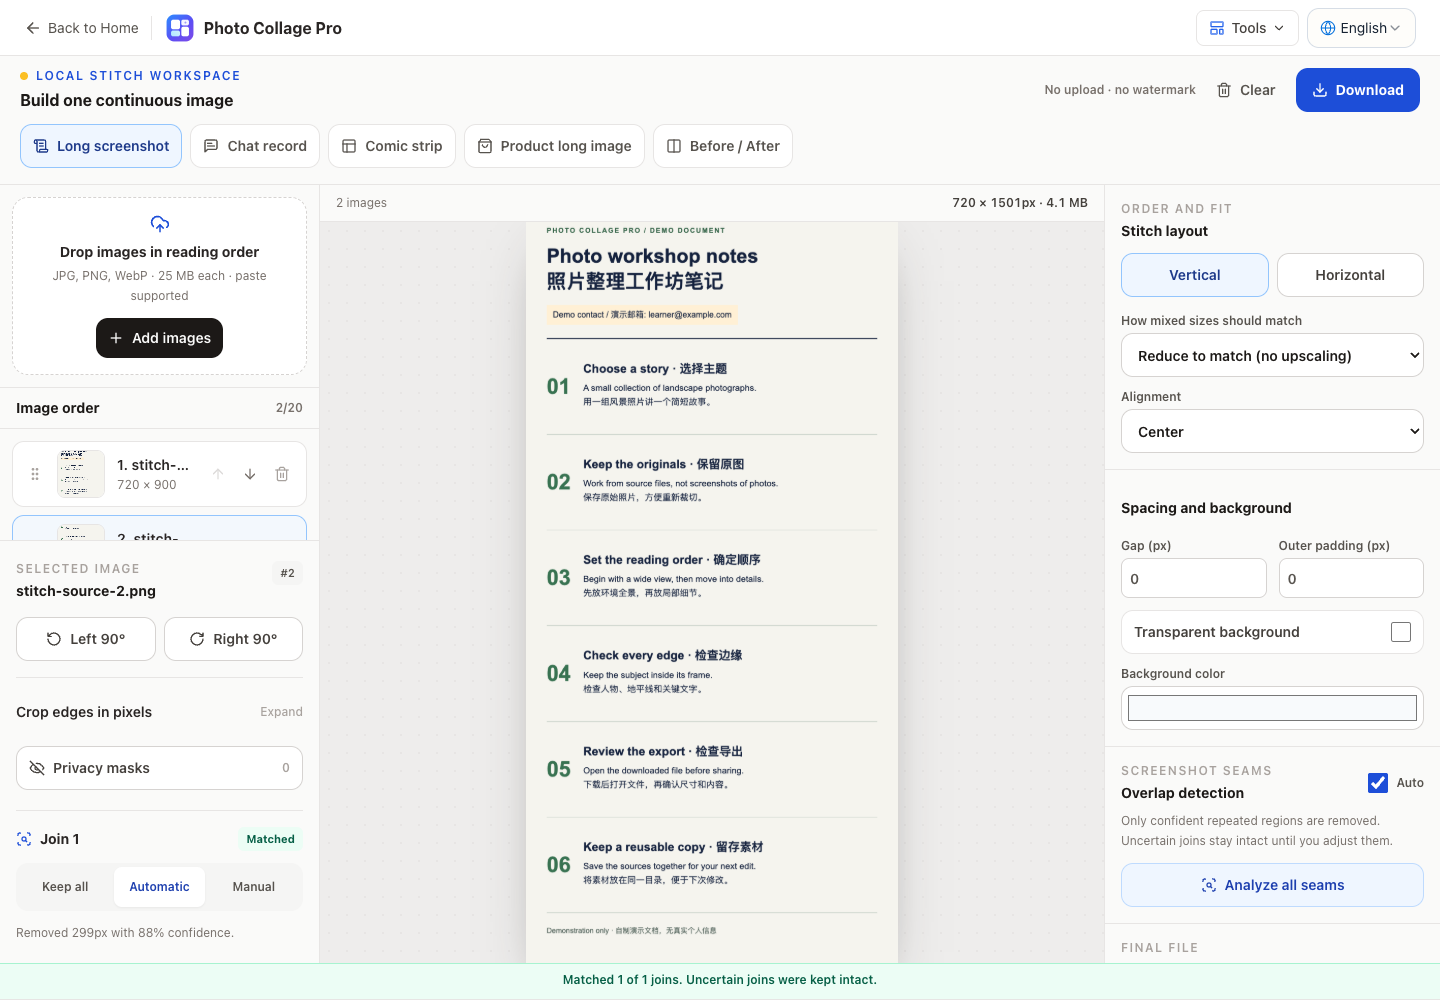
Automatic detection got close, but it did not reproduce the known overlap exactly. The confidence percentage is the detector's matching score, not a guarantee that no content is missing. The one-pixel difference here is small; the important habit is still to verify the join.
For the Before export, we chose Keep all for that seam. That produced the 720×1800 image at the start of this article, making the repeated section easy to see.
Correct this seam to 300 pixels
Select Manual for Join 1 and adjust Remove from this image to 300px. The control is a slider; you can focus it and use the arrow keys for fine adjustment while watching the value. The preview becomes 720×1500: 900 + 900 − 300.
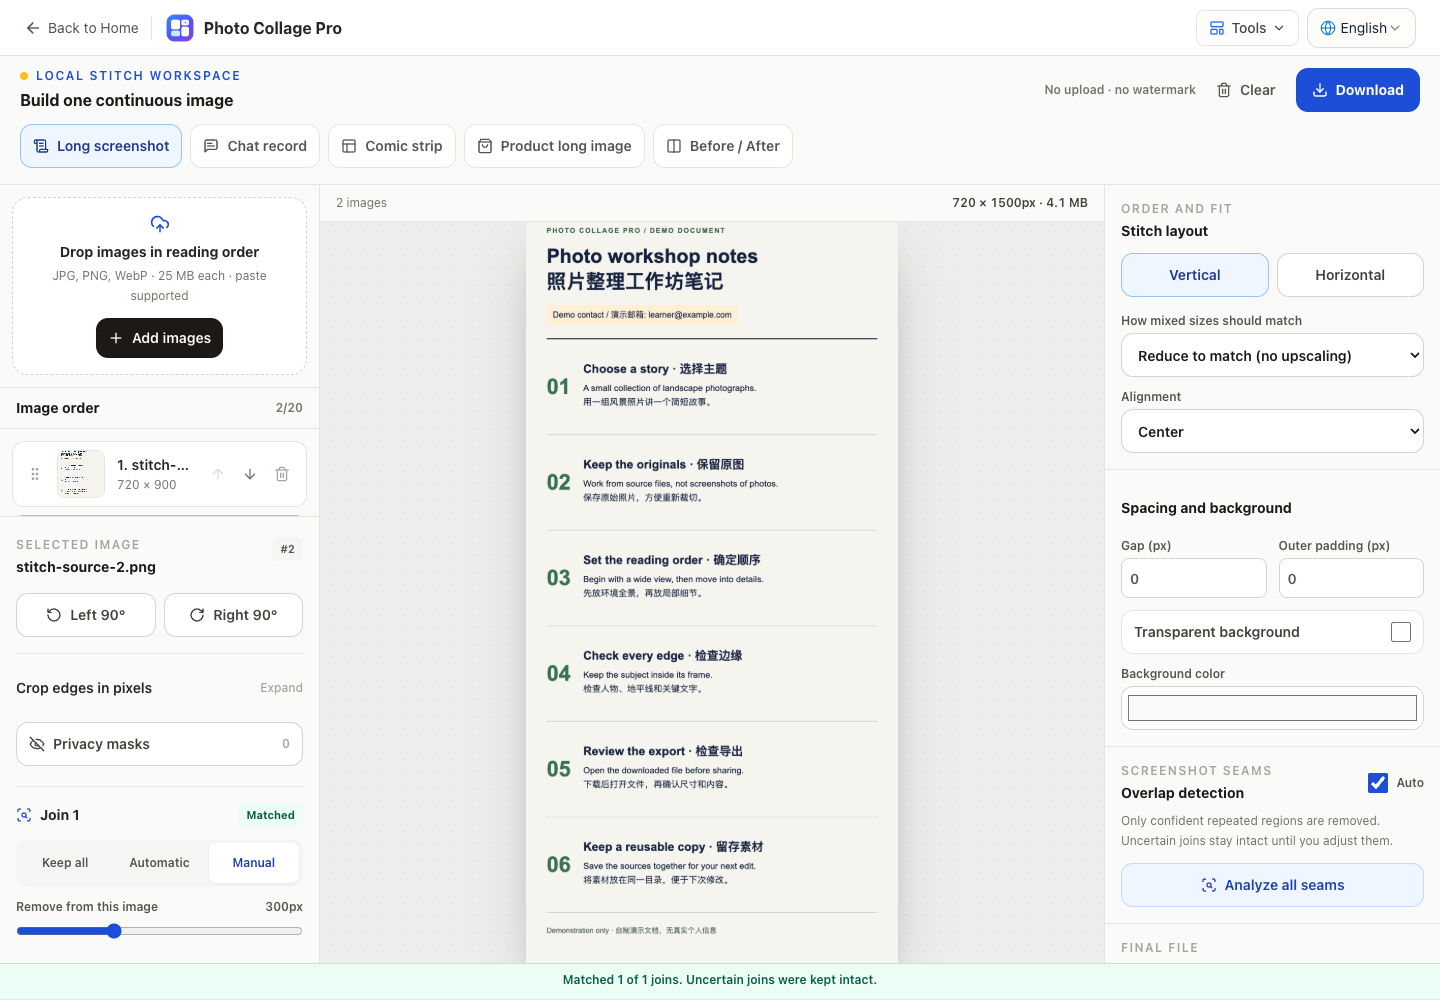
Read across the join around note 04, “Check every edge.” The heading appears in the first capture and the continuation comes from the second. In the corrected export, the heading and its two lines belong together without a duplicate passage.
A different pair may need no trim, a larger trim, or separate removal of a repeated app header. If detection is uncertain, leave the content intact while you compare the originals. Never remove a paragraph just to make a join look tidy.
Mask the sample contact before downloading
Select the first thumbnail, open Privacy masks, and drag a rectangle over the demonstration contact row. We covered the whole row, including its label, then chose Apply masks.
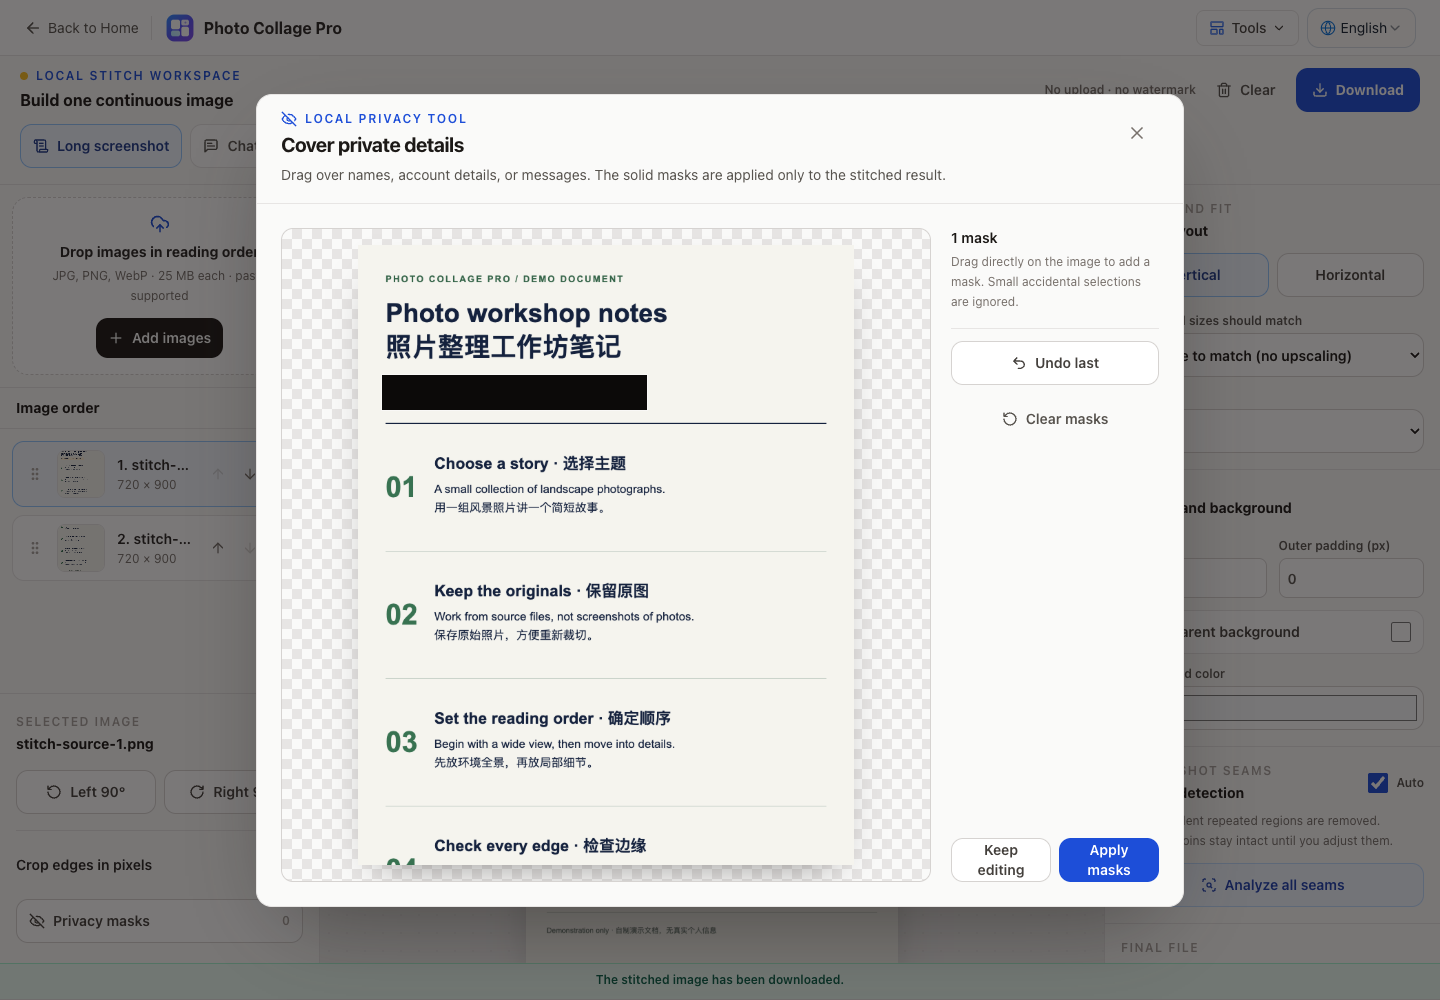
When using real screenshots, inspect every occurrence of the detail you intend to hide. Covering a header will not cover the same name in a quoted message. Check the downloaded file rather than assuming the on-screen selection is enough.
Export and verify the original file
Keep PNG selected and download the result. Open our actual 720×1500 PNG export to inspect the text and the solid mask. Verify all six numbered notes, the join around note 04, and the footer. There should be no duplicate section and no readable email address beneath the mask.
PNG is a useful starting point for document screenshots because it avoids JPEG artifacts around letters. A very long image can still exceed browser memory or canvas limits. When that happens, use the tool's scaling or segmented export, choosing segments if shrinking would make the text unreadable. This small example does not exercise those limits.
The composition happens locally in the browser, but the exported image becomes shareable data once you send it. Download the finished file before closing the editor, and keep the originals if you need to revise the trim later.
If you want a designed collection of photos rather than a continuous document, use the nine-photo collage guide. Its fixed frames solve a different task and should not be used to crop away text you need to preserve.